

How to take apart and disassemble an Xbox One controller
If you want to disassemble an Xbox controller to try and fix a stuck joystick or unruly d-pad, here's how you lot tin can go well-nigh it quickly and easily.
Note: Disassembling your Xbox controller volition void its warranty, so disassemble your controller at your own risk!
Products used in this guide
- Tools for the job: Vastar T6 T8 T10 Screwdriver Kit ($10 at Amazon)
- All-time in the concern: Xbox One Controller ($46 at Amazon)
How to take apart an Xbox One controller
- Consider working on a tray to prevent screws or other parts from falling on the flooring or getting lost.
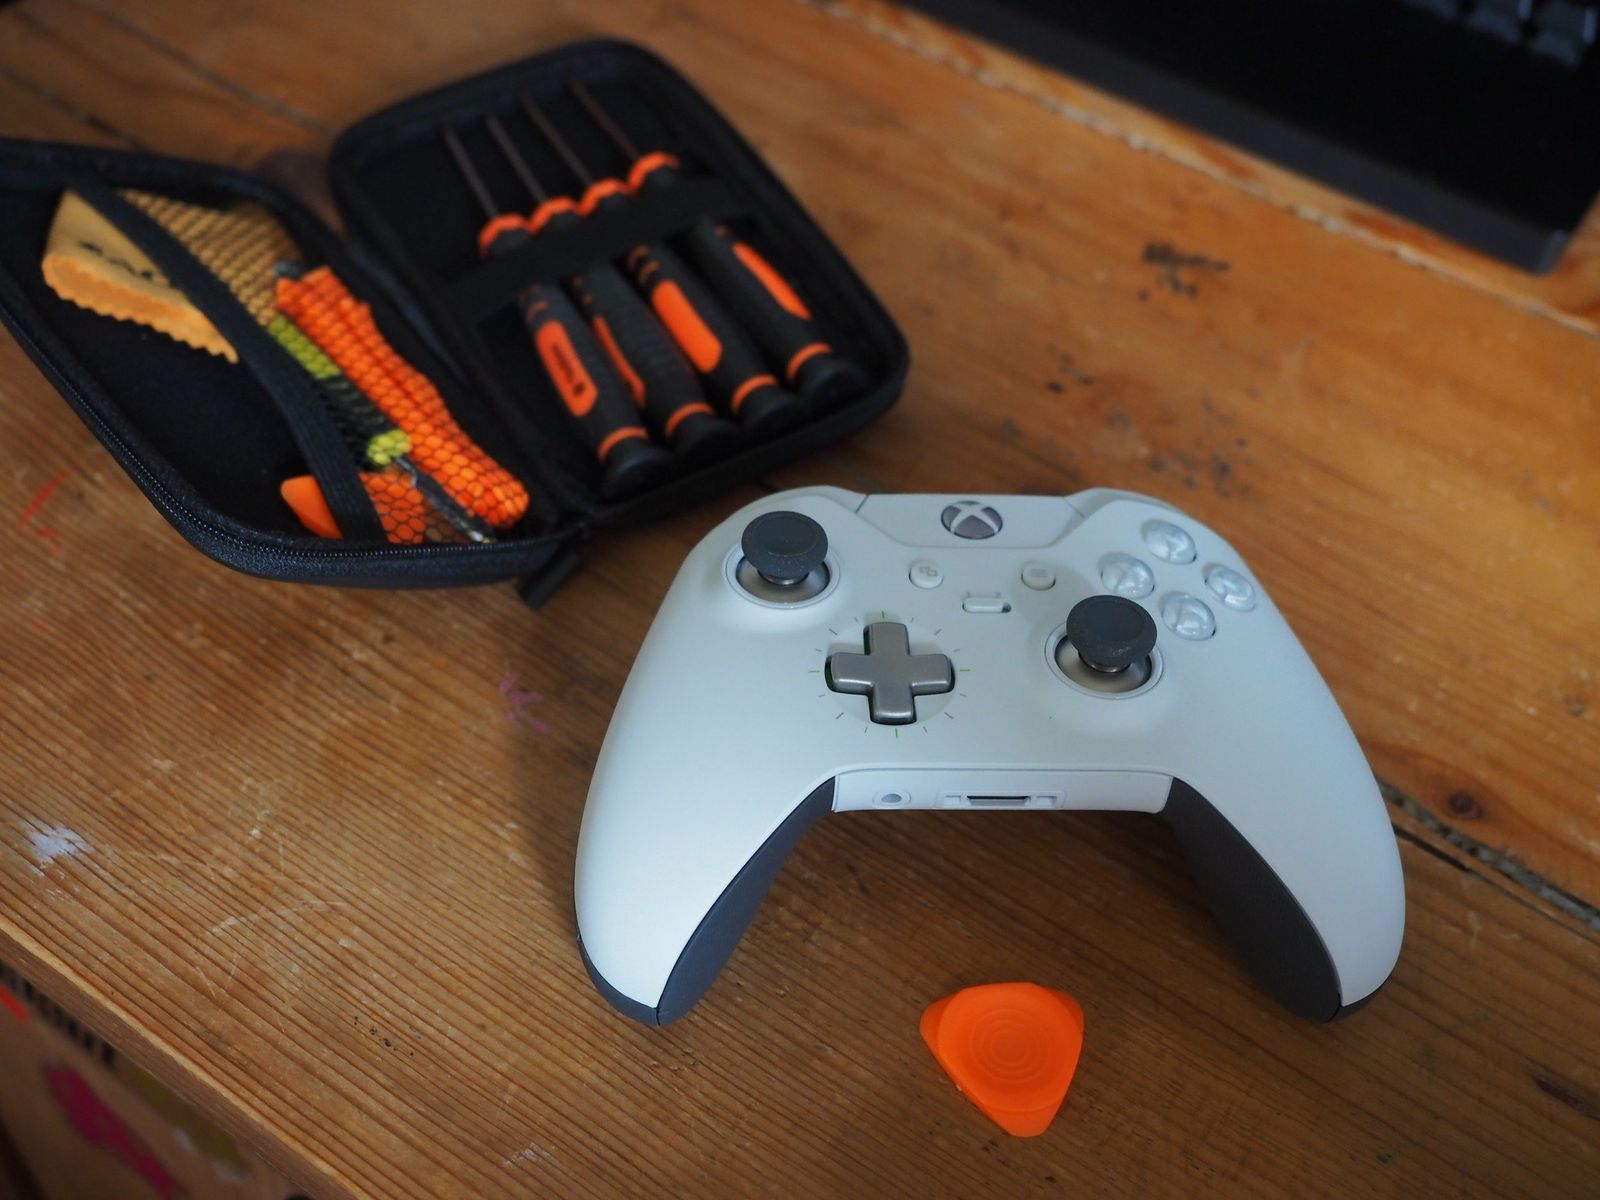
- Take the orange pry tool from your tool kit.
-
Slide the pry tool between the plastic seam on the grips every bit shown.

- Lever the grip abroad from the main controller body. Note that there is also adhesive property it in place under the plastic, so don't be afraid of applying some force.
- Repeat this again for both grips.
-
Next, we'll remove the screws. In one case the screws are removed, your Xbox controller will come apart like a sandwich. Exist extremely careful considering if you pull information technology apart too difficult, yous may harm the cablevision that connects the battery to the circuitry.

-
Discover your T8 screwdriver from your kit, and begin removing the five security screws as shown. Note that one of the screws is hidden behind the sticker in your bombardment housing.


Now, you tin can have a await at the inner workings of your gamepad. Take care not to misplace whatever of the parts, though!
Additional notes

From here, the controller is split into iii chief parts. A forepart faceplate, the body with the circuitry, and the backplate with the battery housing. Be careful as to non lose any parts while manipulating the controller.
When reassembling the controller, you'll want to ensure that the battery connectors are properly lined upward inside the backplate, and also that the audio jack underneath is properly snugly fit into the outer crush.

I disassembled my controller because, when dropping it, I somehow managed to get the joystick lodged into an awkward position on the within. Taking it apart to reset the positioning of parts in this situations can be a cheaper, or at least a faster culling than sending information technology off for repairs, but brand sure to be delicate since some of the parts are fiddly. And of grade, you tin can void your warranty by doing this stuff.
Our top equipment picks
Tools of the trade

Vastar T6 T8 T10 Screwdriver Kit
For those pesky security screws
This screwdriver gear up has all the tools you lot need to get into your Xbox 1 controller'due south shell.
You'll need a T8-uniform screwdriver kit to go into your Xbox controller's security screws, and this more than does the job. It also comes with pry tools for popping out the grips, making it a one-stop-shop for all your controller maintenance needs.
All-time controller

Xbox One Controller
Arguably the best gamepad of all fourth dimension.
The Xbox One controller is compatible with PCs via USB and mobile devices via Bluetooth, every bit well as your Xbox panel
If something goes amiss during your repair attempt, information technology may exist cheaper to simply pick upwardly a new Xbox controller than send it to Microsoft for a repair. So be extra conscientious!
We may earn a commission for purchases using our links. Acquire more.

Ultimate command
Hither are the all-time steering wheels for Forza Horizon five
Forza Horizon 5 features extensive and improved back up for simulation steering wheels. To get the about out of this open up-globe racing game, consider i of the best racing steering wheels bachelor for Forza Horizon 5.

Source: https://www.windowscentral.com/how-disassemble-xbox-one-controller
Posted by: lewtercand1993.blogspot.com
0 Response to "How to take apart and disassemble an Xbox One controller"
Post a Comment